When working on a new website, it is a good idea to have it online so you can see how it will look and feel ‘in the wild’, but without the general browsing public being able to access it. This is where a little DNS know-how comes in handy. With websites, you have the domain name (like ‘google.com’) which has its own set of DNS records. This tells your computer where to find the website content when you enter the address in your browser. By editing your hosts file, you can trick or redirect your browser to retrieve the website from a different server, in this case your hosting account.
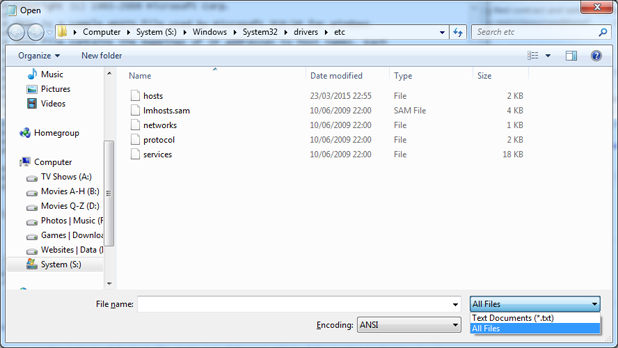
The hosts file is a simple text file, and by default only has a few ‘system’ entries. You will want to edit this file by adding in your own line of text at the end. First, we need to find and open the file. On Windows, the hosts file is found in the C:\Windows\System32\drivers\etc folder. And on newer versions of Windows, you will need to open this file as Administrator. In your Start Menu, right-click on the Notepad icon and click ‘Run as administrator’. Once open, click File > Open. Navigate to the folder mentioned previously and then select the option to view all files. You will now see the hosts file listed – double-click it.
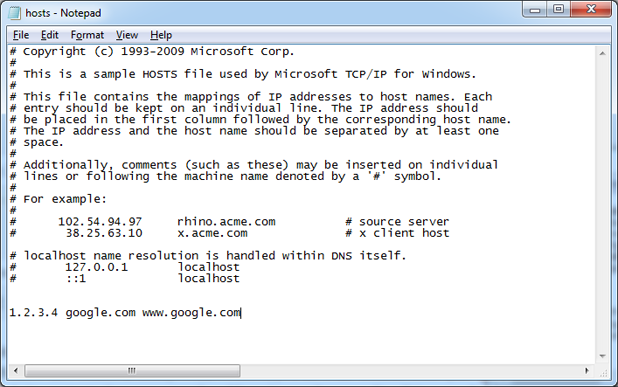
You will now see the contents of the hosts file. At the end of the text, add the following line (replacing ‘google.com’ with your own name, ‘1.2.3.4’ with the IP address of where your work-in-progress website is hosted):
1.2.3.4 google.com www.google.com
This line basically says to your computer “google.com is located on the server with IP address 1.2.3.4”.
Now we need to save, and it is important how we save it. Click on File > Save As, select the option again to view all files, and double-click the hosts file. It will ask you is you wish to overwrite the existing file, and you do. That’s the hosts file edited, but a further optional step is recommended here. We want to clear out any old record our computer cache is storing for our domain name. To do this, we need to open the Command Prompt and run a simple command.
You can open the Command Prompt by clicking on the Start Menu > Run. Type in ‘cmd’ and press Enter. You now have the Command Prompt open, so run the following command:
ipconfig /flushdns

What the above command does is flush out any records that your DNS cache is storing. Next time you go to the website in your browser, your computer will not check the live DNS records for the domain, but instead pulls up the record we added to the hosts file. We can now view how the website will look and feel once it is live, without making it available for general viewing.